I am always working on one project or another! I vowed that our kids would each get a quilt made by me. One down and four more to go (quilts that is!!) The hexagon quilt is for my youngest. She's a quilter as well but hates, detests, can't stand....hand sewing! Anything that has to do with hand sewing is a vehement "NO THANKS!" ha ha! Good thing that I love hand sewing and I know that she will appreciate all the work that goes into this!
 |
| My stack with so many more to make! |
 |
| This is a freezer paper hexie ironed on to fabric and then trimmed as close to 1/4" as possible (give or take....a bit bigger is a bit better!) |
 |
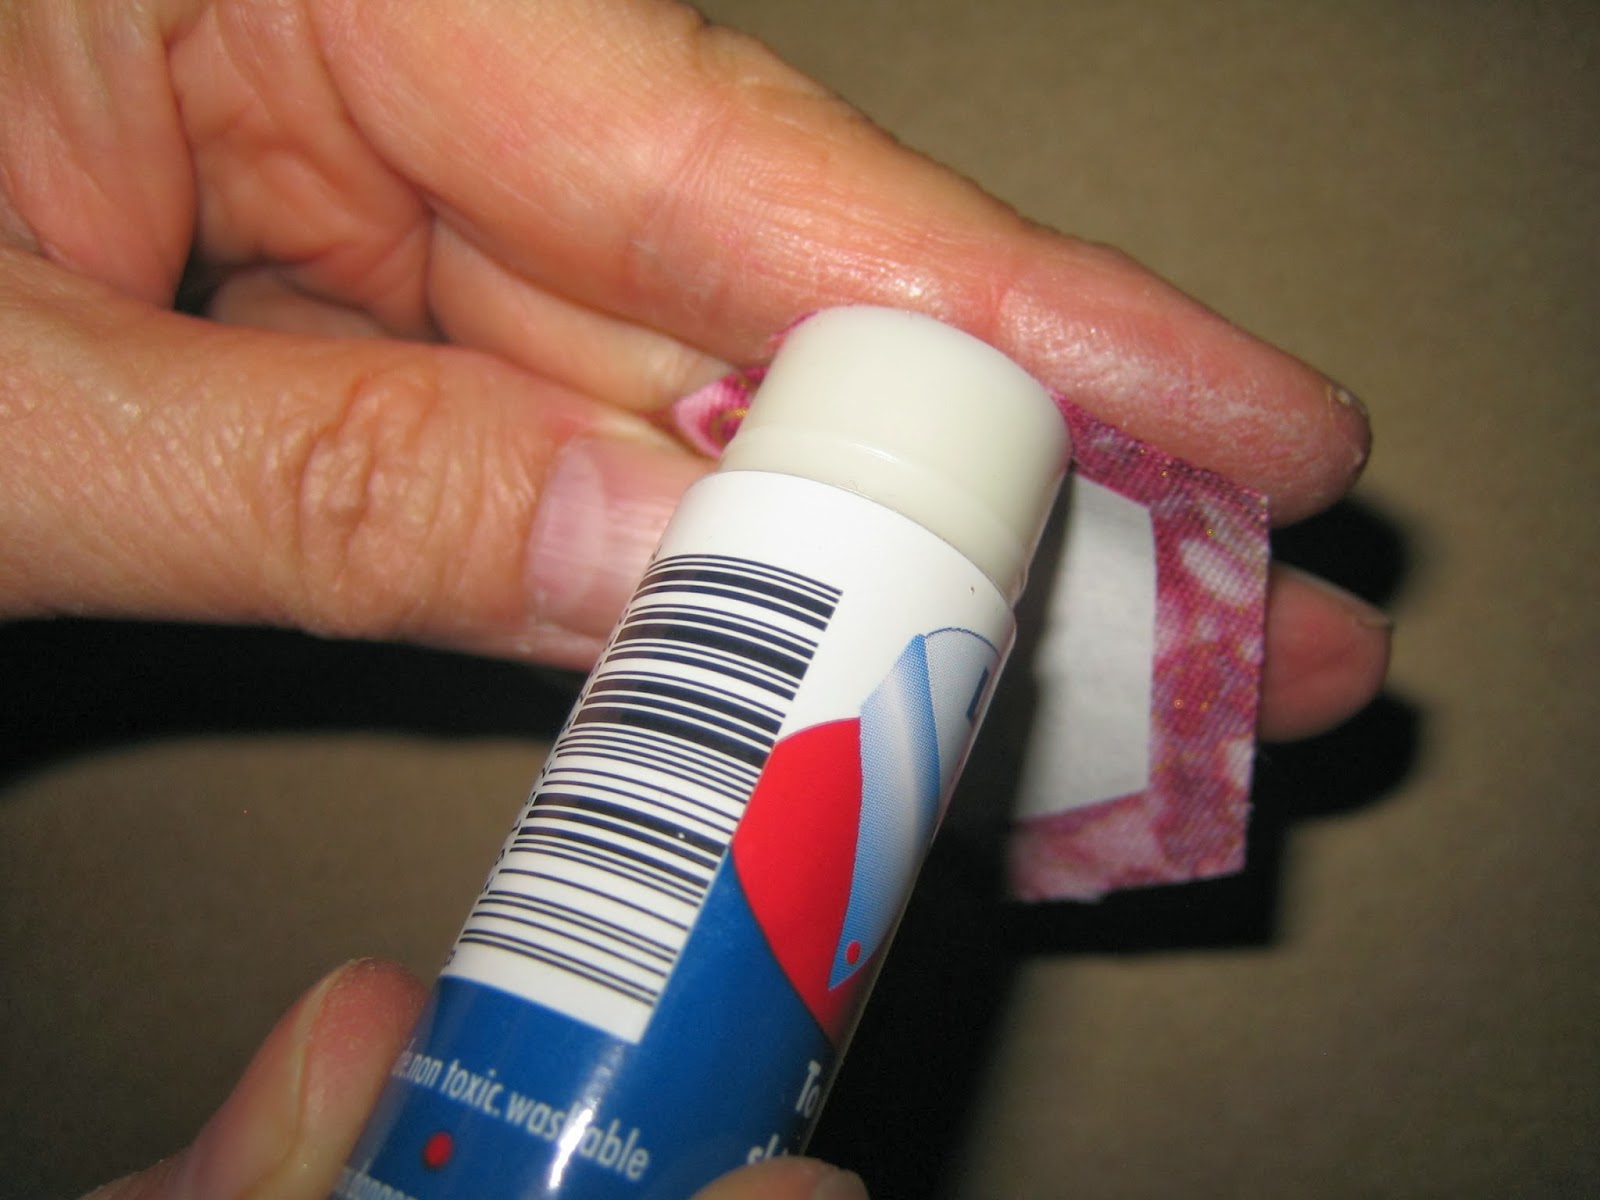
| Use a glue stick and paste on one side of the hexie on the fabric (don't worry if you get any on your giner/ washes off/ or the paper as you will be pulling out the papers down the road) |
 |
| Fold down over the edge of the paper and press firmly down from one end to the other. |
 |
| make sure that you have the edges down as well as your next step will include folding the next corner down. |
 |
| This is where you glue the next side to the right of the one you just glued -- or if you are left handed, you will be gluing the side to the left of the one you just glued! |
 |
| Make sure you press down firmly (ignore my horrible cuticles and nailes.... I am not a girly girl when it comes to my hands!) When you press down firmly, you get nice crisp edges and nice sharp corners! |
 |
| You can see in this photo that the glue is even on the edge of my finger -- trust me...you want it to be right to the edge of that fabric so that it holds! Remember, this glue will wash out and the papers will come out once all the hexies are sewn! |
 |
| This is your ready-to-go hexie! |
 |
| I've used all kinds of glue! My favorite is Sewline -- it's white and has a smaller tip. My next fav is the glue stick, but it's larger and I have to wash my hands more often. My last choice is Fons & Porter -- which is blue and really sticky/goopey to get off -- but works fine on the hexies. Try them and see which one you prefer! |
 |
| A fuzzy pic of the hexies ready to be sewn! |
 |
| The hole-punch hexies make for easier removal when you are ready to pull them out. The hexie papers above I was not going to waste! |
If you have questions, please don't hestitate to ask. I can't guarantee an instant response, but if you email me at onlydiamonds@hotmail.com -- it will get you a faster response than just in the comment section (I'm not a great consistent blogger as you can tell!) My hexies are on white freezer paper. I cut them out and iron them onto 2.5" strips of all different cotton fabric that I have collected. I use scraps, purchased jelly rolls and fabric that I've cut myself on the Accuquilt. I have even used charm squares (but find that I cannot consistently get 6 hexies for my flowers, so I tend to just cut enough hexies for my center squares.) Find a hexie size that you like. There are tons of free printables on line, or you can draw a bunch of your own on graph paper and photocopy. When you photocopy -- make sure you copy on the SAME photocopier for all your hexies. Photocopiers vary. I print out my "master" sheets that I will use to cut my freezer paper out on. I then fold my freezer paper to match the size of the photocopied paper. I then staple in the center of EACH hexie. I cut (with paper scissors, each pile of hexies. I find that each stapled bunch that I can manage easily is the master top sheet plus 4 layers of freezer paper. Once all the hexies are cut out -- I hole punch each bunch and then remove the staple from each bunch, tossing the top hexie out (some die-hards will put a dot of glue on the center and put it on fabric -- I'm too lazy and just want to place the wax side down of the freezer paper hexies and iron them on! When sewing together, use s small whipstitch. Some people use the same colored thread to match the flowers they are sewing. I use a neutral color and find that my stitches are small enough that you don't notice the thread. Of course you are going to use what you are comfortable with. Some people want to use only cotton, some people will use a polyester. Again, it is your choice. If your quilts are going to be inspected by the quilt police, you already know what the expectations are! ;-) As for needles -- my absolute favorite are Clover Black Gold Needles specifically for applique/sharps (no.12). They are specially polished with Black plating. These needles pierce through fabric "effortlessly"! I totally am hooked on these! Considering that you have glue AND fabric to go thorugh -- they just glide right through! When you can sew without any hitches, you can work on getting those nice tiny whipstiches! If you have to pay a little extra, it is worth it! If you would like to see how I prep my hexagon's before I get them to fabric, let me know! Happy stitching everyone!